Seed starting advice
- Feb 27, 2025
- 7 min read
Updated: Apr 29

Today we're gonna be starting something.
Seeds.
There are many pros and cons to starting seeds indoors vs direct sowing vs purchasing seedlings at the store. In this post, I'm going to go over why we start some seeds ahead of time, when is the best time to start seeds, what you will need, and other considerations to think about. Starting your plants from seed can seem daunting. With my guidance, you'll be an old pro in no time!
Starting seeds indoors ahead of the growing season is generally less expensive, gives you access to more plants, eliminates unknown variables in the conditions of the plant, gives us a jump start on the growing season, and eliminates competition amongst tender seedlings and weeds. By starting seeds indoors, you're giving your plants the best start at life and a chance to grow big and strong! A seed packet holds so many possibilities!
If you're just getting started there is nothing wrong with buying plants from the store. Read up on things to look for to make sure you're getting a healthy plant (is it root bound? is it flowering too early?) and go for it. We all have to start somewhere and diving in to gardening with starting seeds can be overwhelming! Start small. Baby steps.
Back to seeds.
First, you need a plan. What are you going to grow and where? What would benefit from an indoor start and what would prefer to be directly seeded into the garden? Some plants have a longer growing season or be especially fragile and need that head start. Others don't like to be disturbed and can't handle transplanting. Yet others need a process that mimics winter and the spring thaw called stratification. I have been accused of over planning but I don't believe there's a such thing. The more information you have, the better.

Once you've determined what you want to grow, gather your supplies. You'll need a reliable place to source your seeds, growing medium, containers for your seedlings, and potentially light and heat sources. In the Mid-Atlantic region my favorite source for seeds is Southern Exposure. They are a small co-op in Virginia that focuses on non-GMO and heirloom seeds that do well in our region. Their seeds have excellent germination rates and, in my experience, produce healthy plants. If something isn't available through them, I'll check Johnny's Selected Seeds. They're employee owned and known for putting out quality products. Other than seeds you'll need something to put the seeds in - a container and soil-less seed starting mix. Your container can be anything that holds dirt and drains. Anything from upcycled yogurt and egg containers to toilet paper tubes (compostable!) to the fancy seed starting trays with a reservoir at the bottom for water and a lid. As I've been starting seeds for a number of years, I've invested in trays and use germination mats beneath some of them to keep them warm. You'll want to use soil-less mix, primarily made with a combination of peat moss and vermiculite, and not potting soil or garden soil. We wany to use the soil-less mix because it cuts down on weed seeds and bacteria that can affect your seedlings. We're giving our little plant babies the best possible start so they can grow big and strong and feed us delicious veggies!

Your seed packet has lots of good information. On it you'll see ideal growing conditions, plant spacing, days to harvest, when and how to fertilize, and when to start or sow. It'll typically be anywhere from 6-12 weeks before your USDA Plant Hardiness Zone Frost Date. Your Hardiness Zone is based on min/max weather extremes of your area and from that they get the Frost Date. The Frost Date means that it's not likely to frost.
Most things are able to be set out then but some plants I wait until it's warmer. More on that later. My Frost Date in zone 7B is April 10. Counting back, that puts me right on time (maybe a lil late!) in getting my seeds started.

First, you'll pour a good amount of medium in to a bowl or bucket and get it moist. You want it moist, but not wet. If you make a ball it'll form in your fist with a few cracks but won't fall completely apart and won't drip water. Fill your seed cells to the top. Now, check your seed packet for how deep your seed needs to be buried. Some seeds need light to germinate, some need darkness. When in doubt, bury the seed to about twice as deep as it is wide. Mark CLEARLY what you planted where. Even once they pop up it can be hard to tell what was planted where until they're well established. I usually make a full on gridded out key to what is where in my journal. Heat aids in germination. Your seeds will pop up without it but it helps and they're more likely to pop up sooner with a bit of bottom heat. If you've purchased a germination mat that's perfect. It'll stay the right temp to not burn up your roots because that's what it's made for! Otherwise, a heating pad at its lowest setting will work well. You'll also want to cover your seeds. This holds the heat and the moisture, creating a greenhouse effect.

The fancy trays come with them (and sometimes other nifty tools too!) but you can make do with plastic wrap over the top with toothpicks to hold it up from touching the soil directly.
Watering is SO important and I set SO MANY ALARMS and still lose a few plants every year because I forget they exist. I'm going to try adding it to my “After Work Ritual” so I'll remember. I know that by making it easy (and putting the whole rig upstairs so I can see it) would make the Habit easier to remember but there's just no room!!
Watering itself can be done in a few different ways. Ideally, you'll have a setup that makes it so that you can water from the bottom. Either you'll purchase a germination station that enables that or, if you're going the upcycling route, you can set your plants in to a larger container and put the water in there. the plants will take up the water from the drain holes bottom. Once the top of your dirt looks moist pour off the extra in the larger container so that your seeds aren't sitting in water all the time. You could also water from the top but you run the risk of disturbing your seeds with the stream. A spray bottle on mist can be effective initially but a bit time consuming to make sure you get water all the way to the roots. I recommend a spray bottle to start and once your seeds are established watering from the bottom.
After a certain amount of days (varies by plant and conditions), you'll start to see your plants emerge. First they'll have their "seed leaves" or cotyledons. These are the leaves that were inside the seed! Once you start to see these, take your top off. No no no. Put your shirt back on, weirdo. I meant the top to the seedling tray. Sure, you can leave it on initially. Leaving it on is especially important because not everything will pop up at the same time. You just don't want to retain all that heat if it's not necessary and you don't want to stop growth by the top being in the way. Some things will pop up faster than others and that's ok, just make sure the top is off before the second set of leaves, your true leaves, are there.

Up until this point light wasn't really important. Some plants do need light to germinate but ambient light is usually enough for those. Now that you have leaves that require light for photosynthesis you gotta get those babies under some light. One can purchase special germinating lights that have special wavelengths that imitate sunlight. I haven't purchased those because they tend to be expensive. Instead, I bought a hanging fluorescent light, like what you would see in a wood shop, and rigged it to hang from the ceiling. I hung it by a rope that enables me to also raise and lower it as the plants grow. All together it ran me about $20 and covers a good amount of space. When you first put your seedlings under lights, keep the lights about 2" above the plants. This is why it's important to be able to adjust the height of the lights. You don't want them too close as they can burn your plants and you don't want them too far as it could cause your seedlings to be leggy.
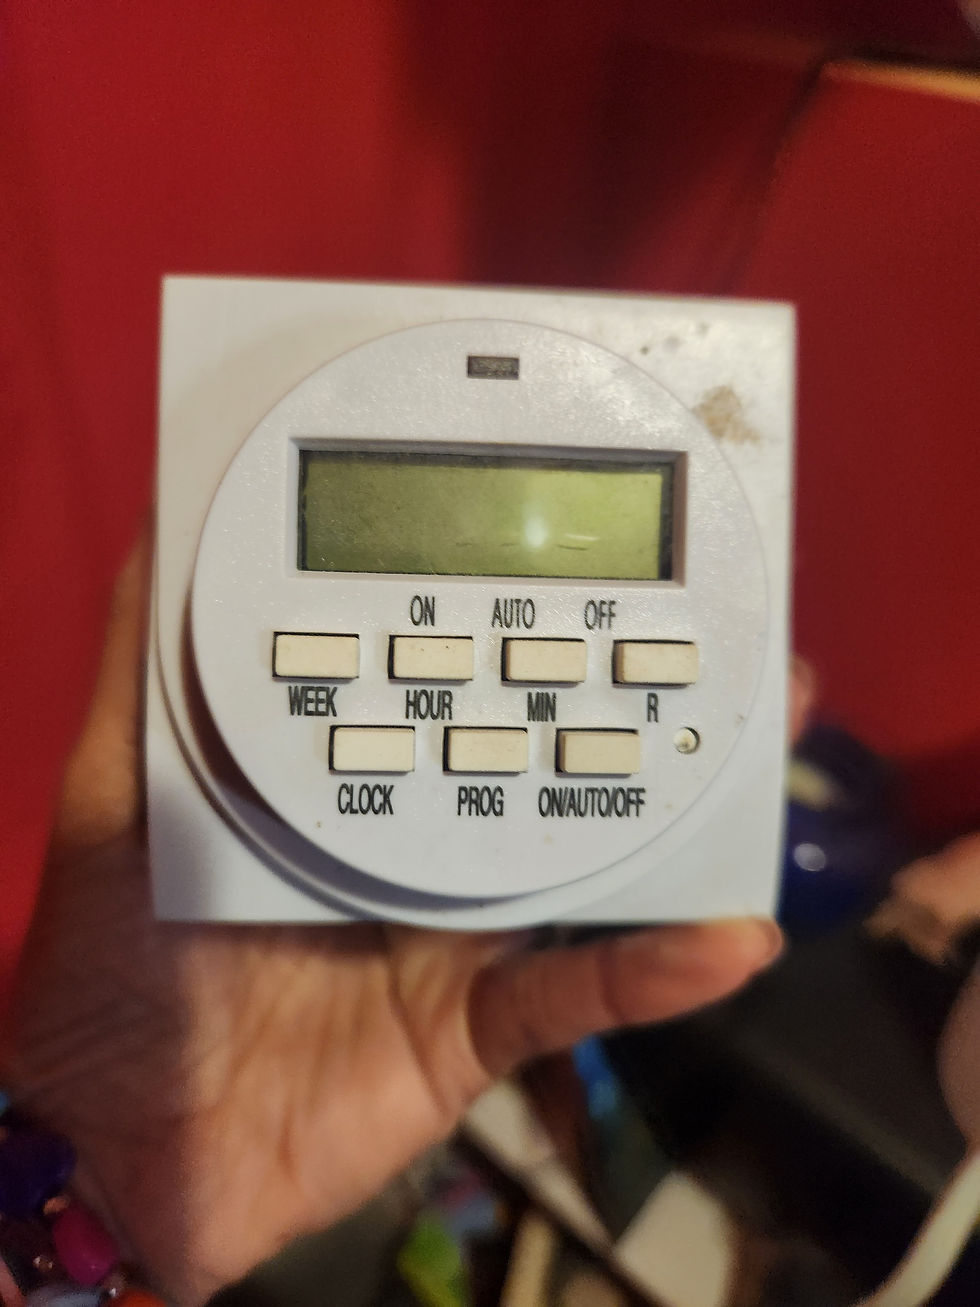
I also picked up a timer for the lights. It was from the hardware store and not expensive. I typically set it for 12-16 hours of sunlight.
Some seeds don't want light and warmth to germinate. Some seeds, especially herb and flower seeds, require a process called stratification. Stratification mimics the changing of the seasons - a period of cold followed by a warming of the soil that signals to the seed that Spring is here and it's time to grow. We can do that in one of two ways. By fall sowing and letting the seed go through this process naturally or by giving the seeds a refrigerator nap. Stratifying seeds in the refrigerator is a simple process that doesn't take up too much space. Peat moss or sand are the typical media for this process. Wet your media like you do for seed starting and put some in a baggie with the seeds. Mush them together so that the seeds have full contact with the dirt and put them all in the fridge for a few weeks. Follow the packet directions for when to plant outside.
ALRIGHT! Our seeds are in the dirt, they've popped their little heads up and are sucking up some light and photosynthesizing and growing big and strong! Out of the woods, right??
Nah. Sorry.
Damping off is a common disease found in soil and water that can affect all seedlings. They're little stems collapse (it's called stem collapse, fyi) and they die and then you see white fuzzy stuff on the soil. Damping off is more common in cool, damp soils so water, but not too deep, and if using one of the fancy pants trays be sure to dump the water a few minutes later. Aside from watering carefully, be sure to clean your trays well if you plan to reuse them. Germs can linger in the pots and cause problems in later years!
I hope this has inspired you to give seed starting a try in your veggie garden! Once you know your Hardiness Zone, you can use that information to find your frost zone and get started! Be sure to comment with what seeds your starting this year and which your direct sowing.
Happy Planting!

Super useful! Thank you!!